1. The big idea
CatalogShoot turns the product photos you already have into a whole on-model catalog — stills and video — and lets your shoppers try garments on themselves. Master these four moves and the rest is detail.
Create a model
Generate photoshoots
Make it move
Storefront Try-On
2. Getting around
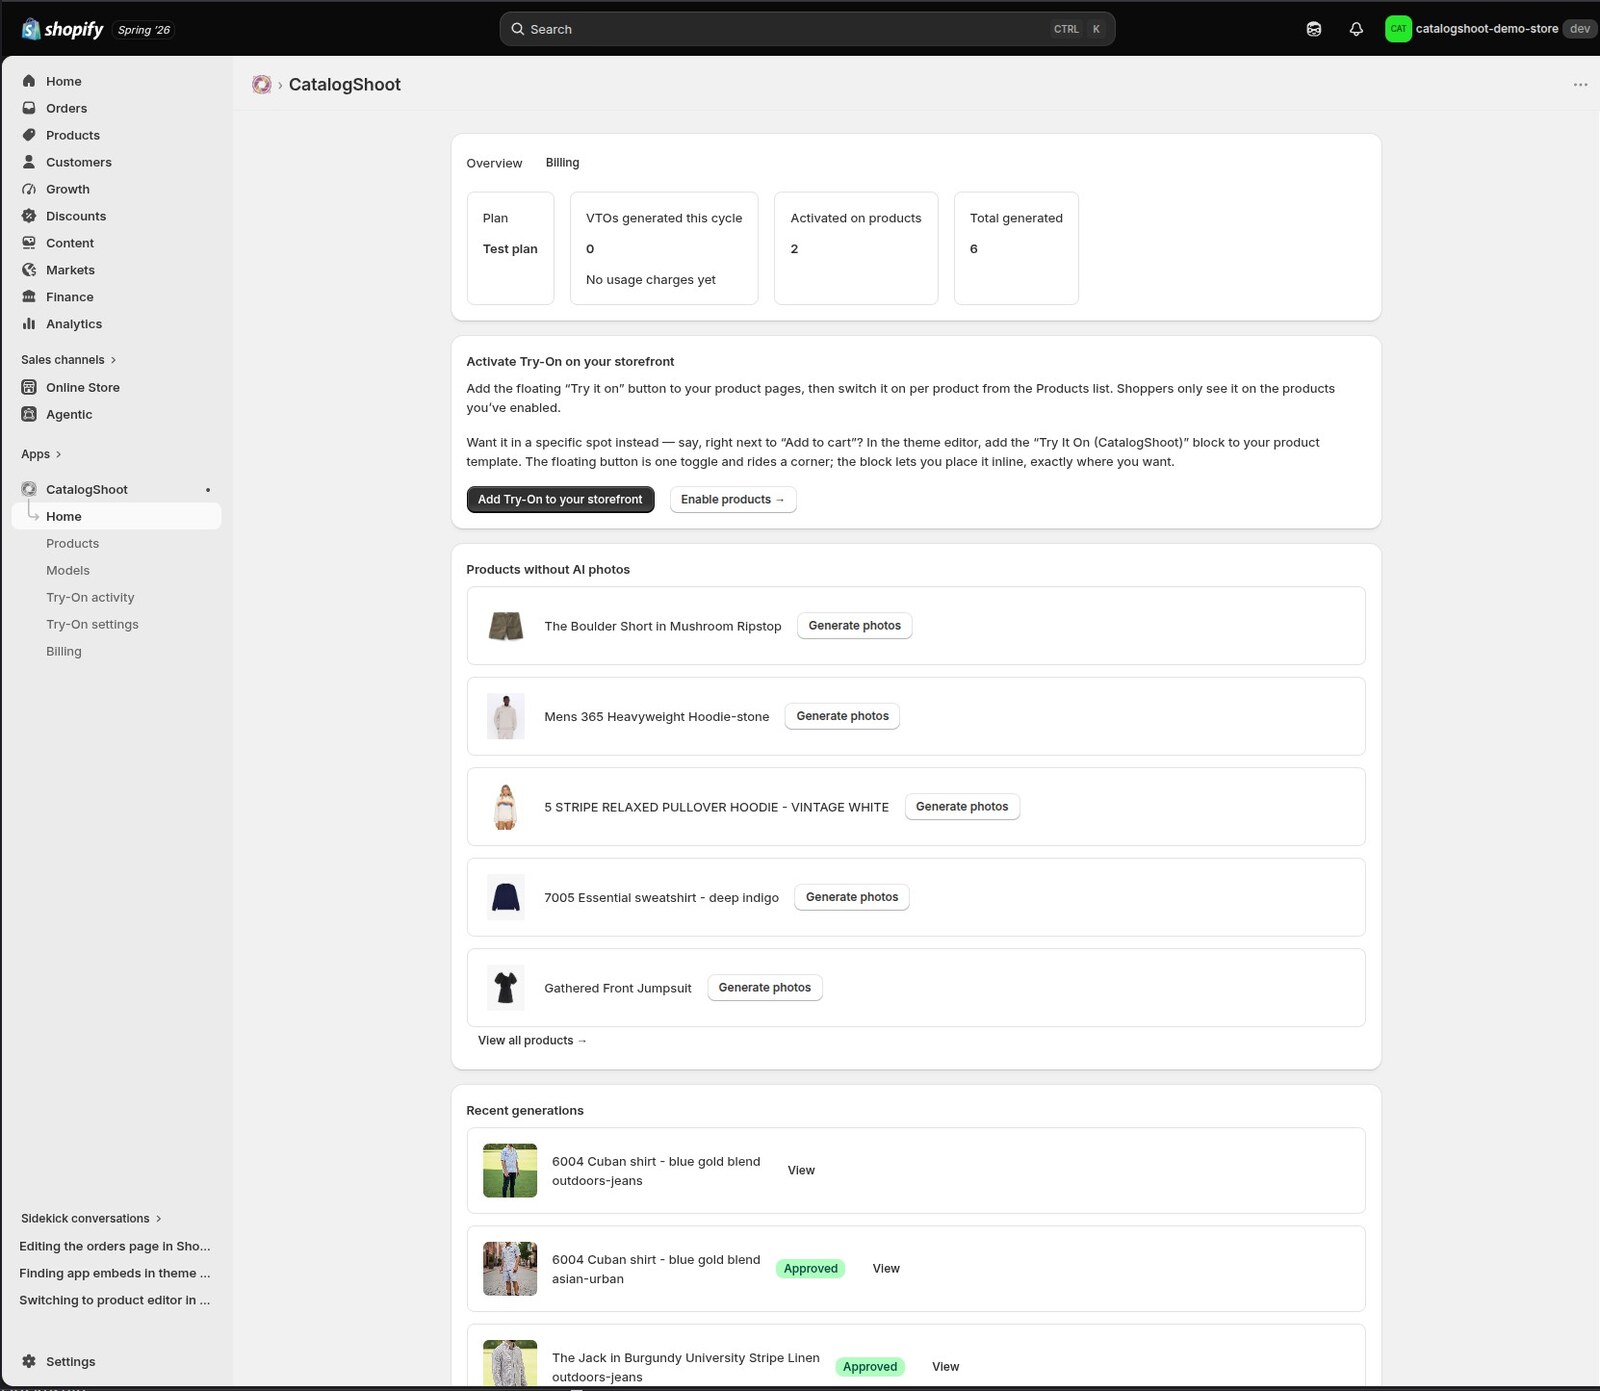
The admin has six main areas, plus a sub-nav that carries your generated work.
Home
Products
Models
Try-On activity
Try-On settings
Billing
3. Your models
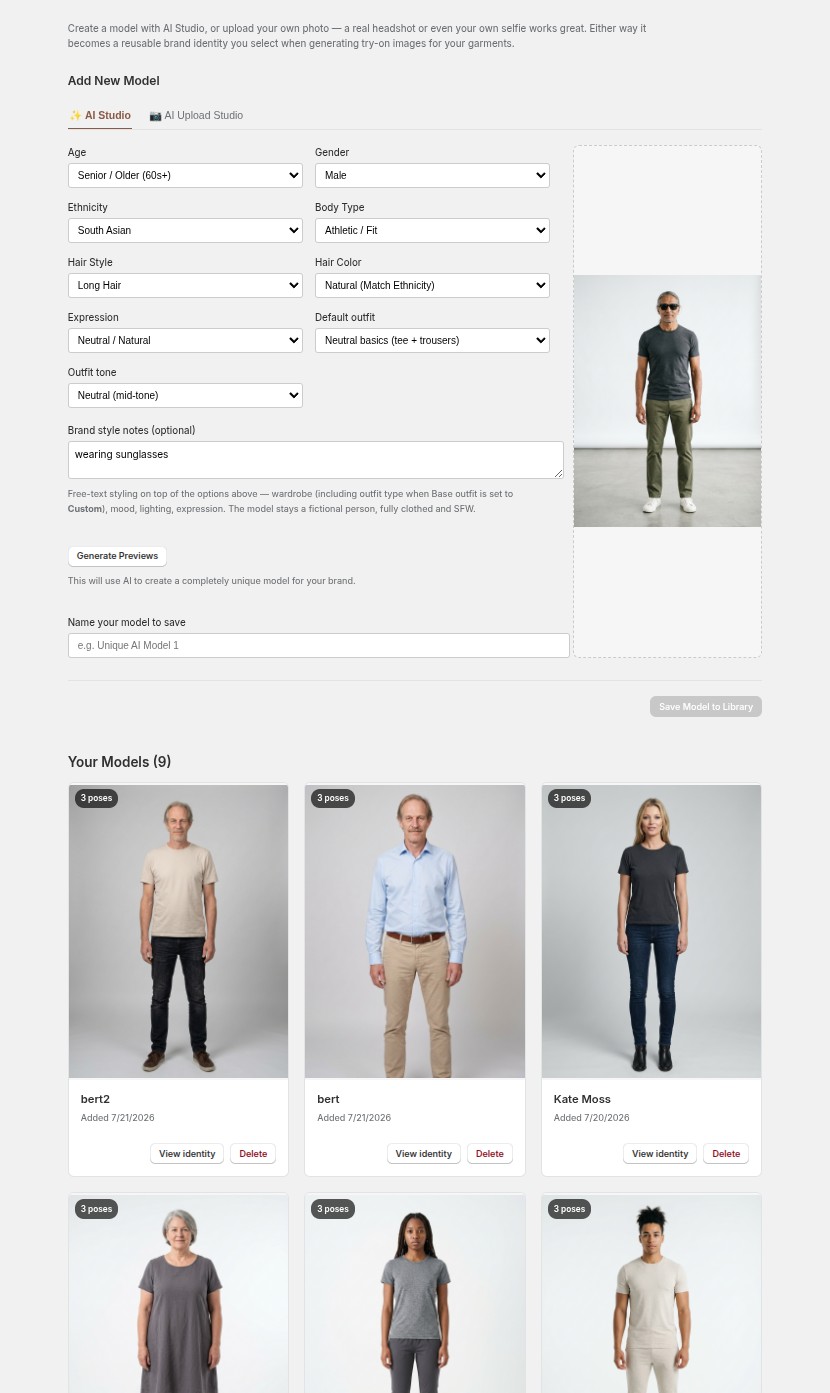
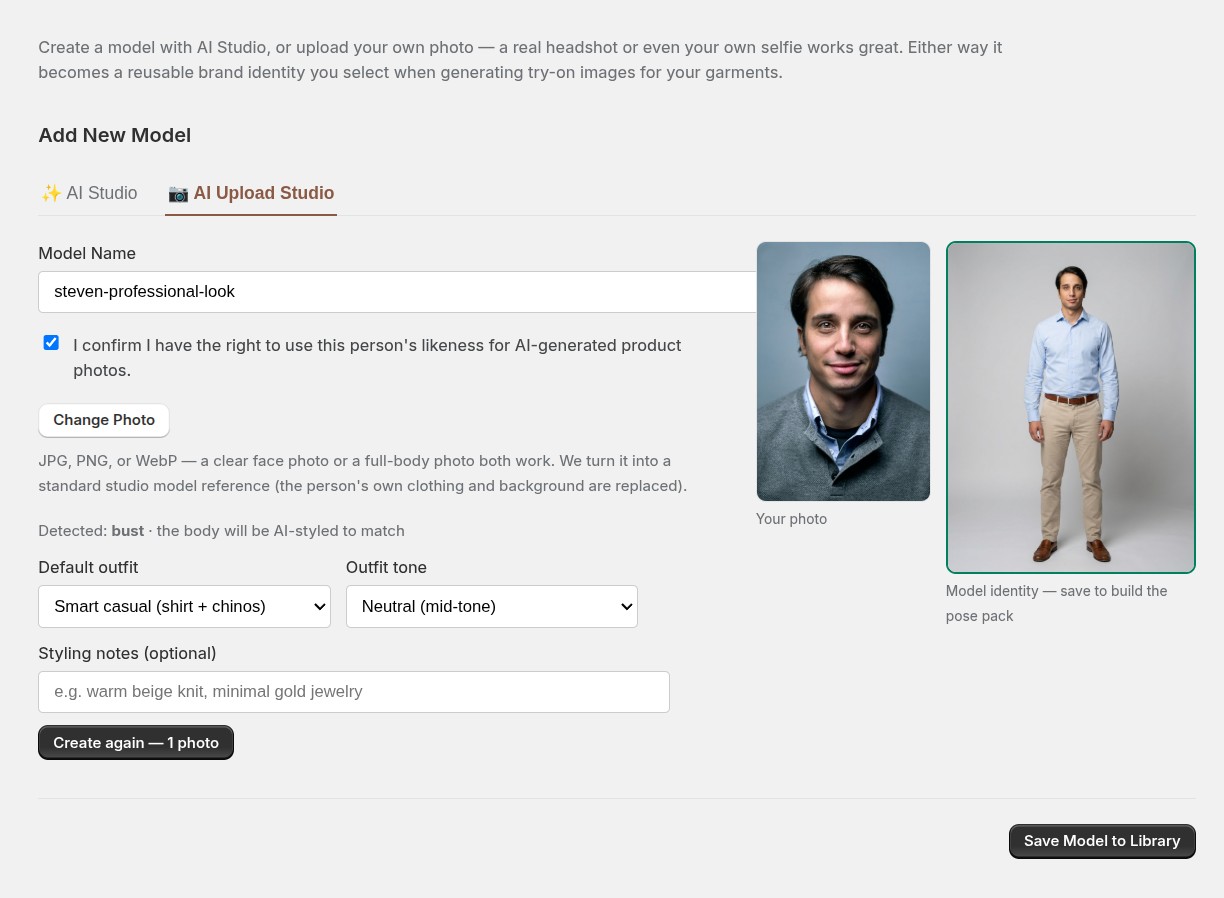
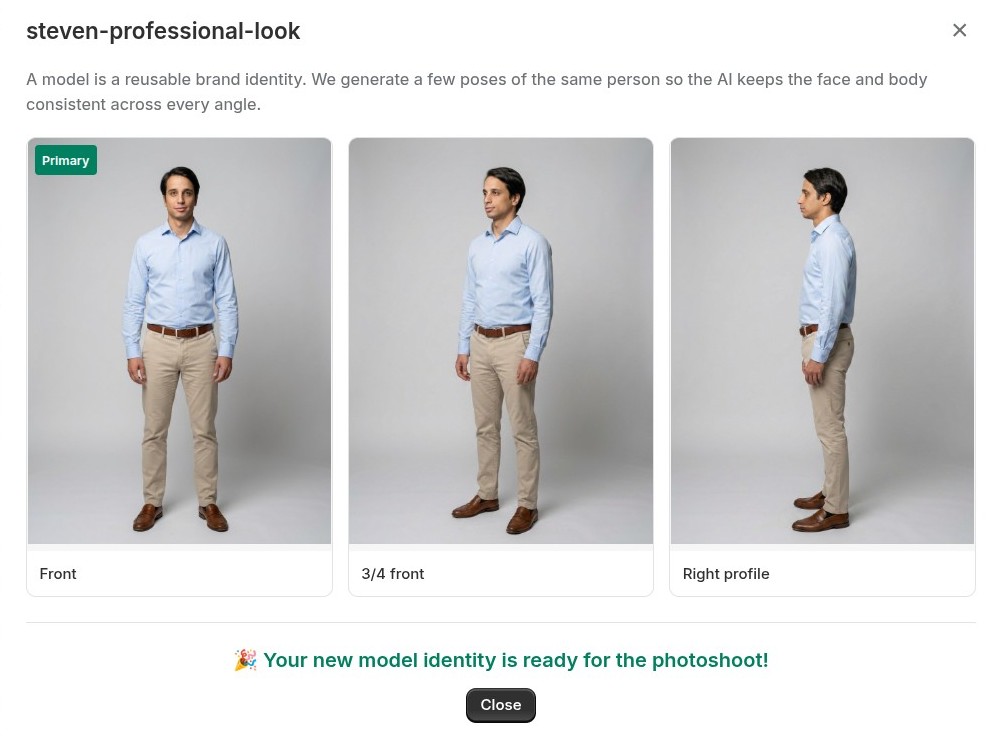
A model is the person who wears your garments. Build one once and cast it across everything, so your catalog looks like a single, consistent shoot. Two ways to make one — both save with a locked identity (front, three-quarter and profile) so it’s recognisably the same person in every shot.
- Build one from options — ✨ AI StudioIn Models → Add New Model → AI Studio, set age, gender, ethnicity, body type, hair and a default outfit, plus optional brand style notes (“relaxed coastal vibe”). Generate Previews, keep the one that fits your brand, and Save Model to Library. Make models that match your customers — a 45+ shop or a streetwear label — instead of a generic stock look.
- Or upload a real person — 📷 AI Upload StudioYour best model might already be on your camera roll. Name the model, tick the consent box, and upload a photo — a face shot or a full-body one. The Studio restages that same person as a clean full-body studio model (own clothing and background replaced; from a face photo it styles a matching body). Pick a base outfit or describe one, approve it side-by-side with your original, and save.
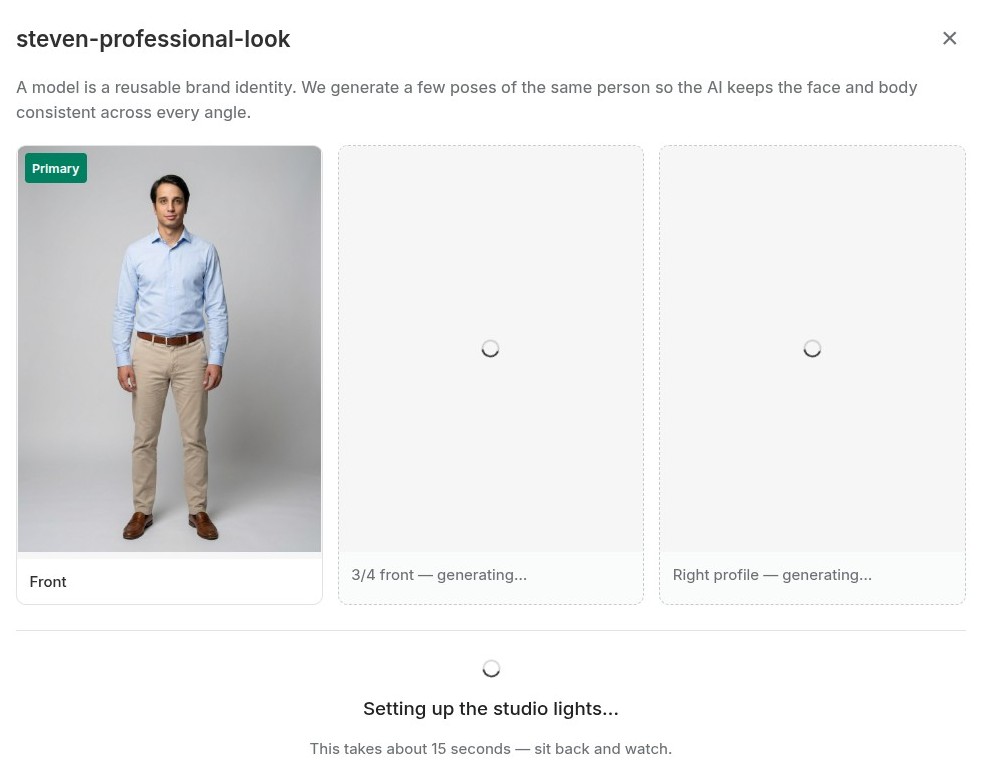
- The pose pack builds itselfOn save, CatalogShoot generates the model’s pose pack — front, three-quarter and profile — automatically. Those angles keep every product uniform. View identity reopens the pack any time.
4. Photoshoots
This is the heart of CatalogShoot: one flat product photo becomes a full photoshoot — your garment worn on your model, in believable scenes, every frame composed like a proper catalog shot.
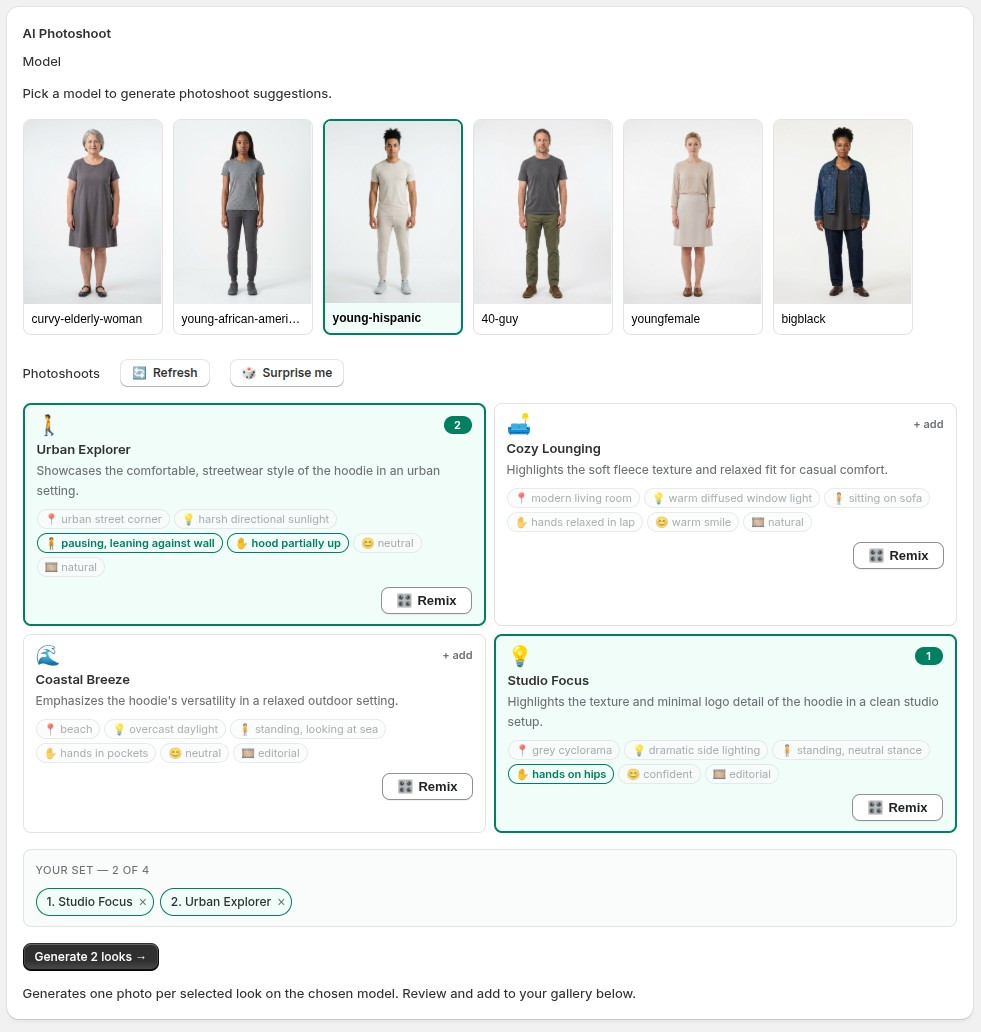
- Pick a product, then a modelOpen Products, choose a garment, and pick a model first. A real stylist doesn’t plan the shoot before meeting the model — so nothing generates until you choose one. Your last model is remembered per product, so you drop straight back in next time.
- Get looks cast for that modelCatalogShoot suggests a set of looks styled for the model you picked — golden-hour street, a cosy interior, a clean studio, mid-stride down a sidewalk. Not enough? 🔄 Refresh for a new set, or 🎲 Surprise me for bolder ideas. Switch models and fresh looks appear; switch back and your previous set returns.
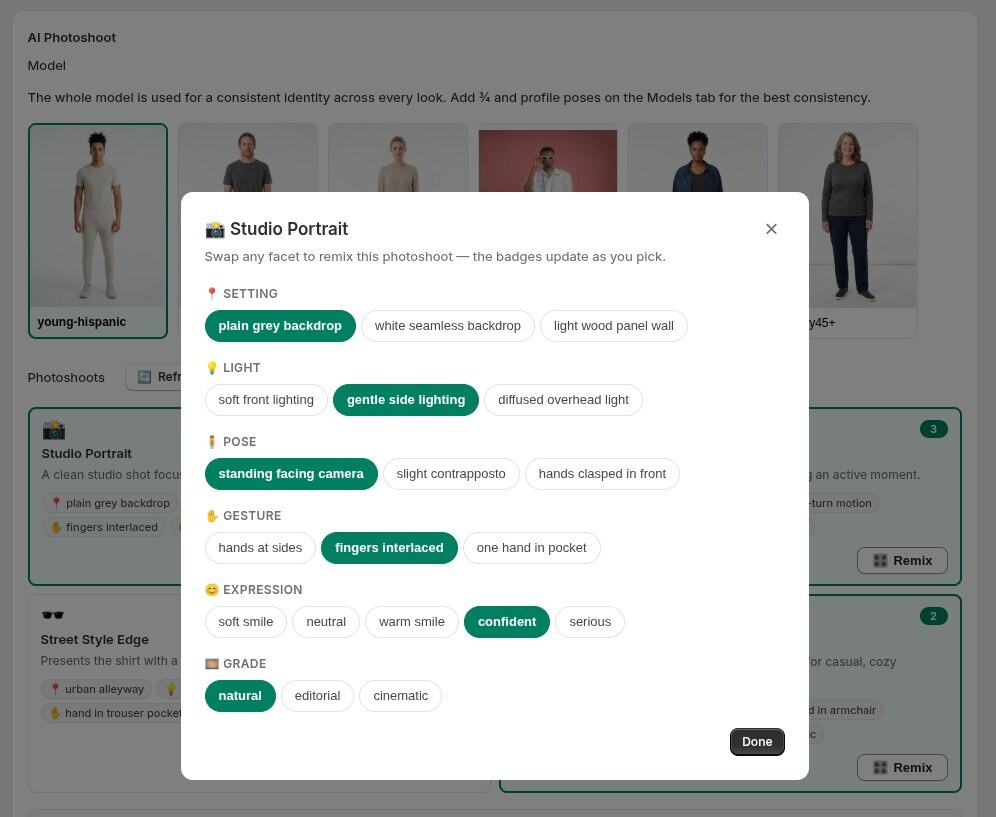
- Remix any lookEvery look is editable. Tap 🎛️ Remix and swap each part of the shot with scene-aware chips — Setting, Light, Pose, Gesture, Expression, Grade (and Props when they fit). The first chip in each row is the look’s own default; tap another to steer. Need something specific? Add a note (“shot from a low angle”, “add a leather tote”) — it steers that one shot only.
- Generate your setSelect up to 4 looks — your set — and Generate. You get a full-resolution photo per look, each landing in Generated photos to review.
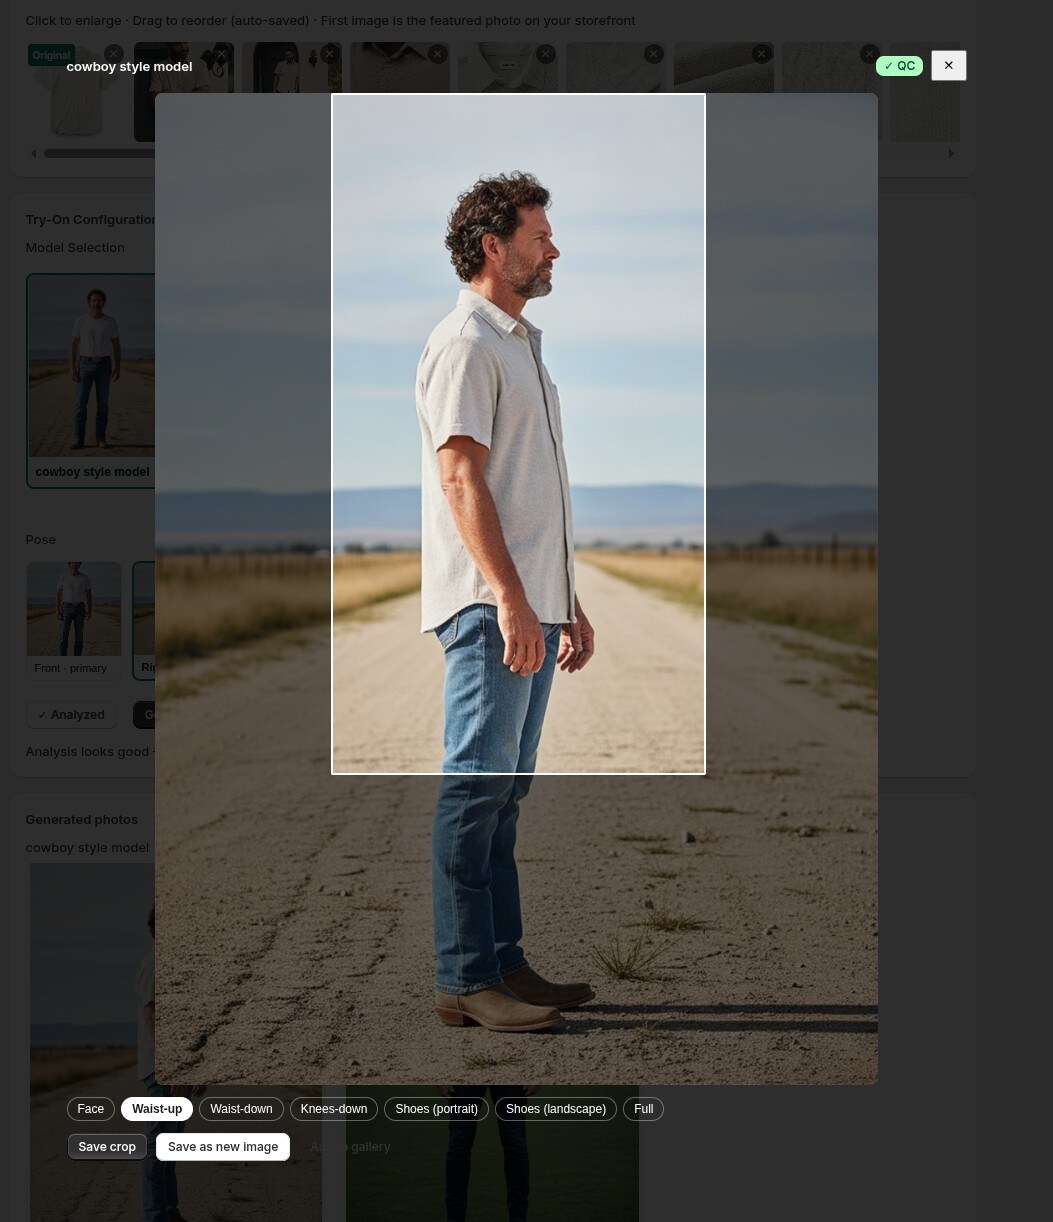
- Review, crop, then publishOpen a shot to inspect it full-size and use the smart crops — face, waist-up, full-body, shoes — detected on that exact image, so a hero, a thumbnail and a detail shot all come from one shoot. Save in place or Save as new image. When a shot’s a keeper, Activate it to the product on Shopify. Don’t love it? It never leaves CatalogShoot.
5. Product video
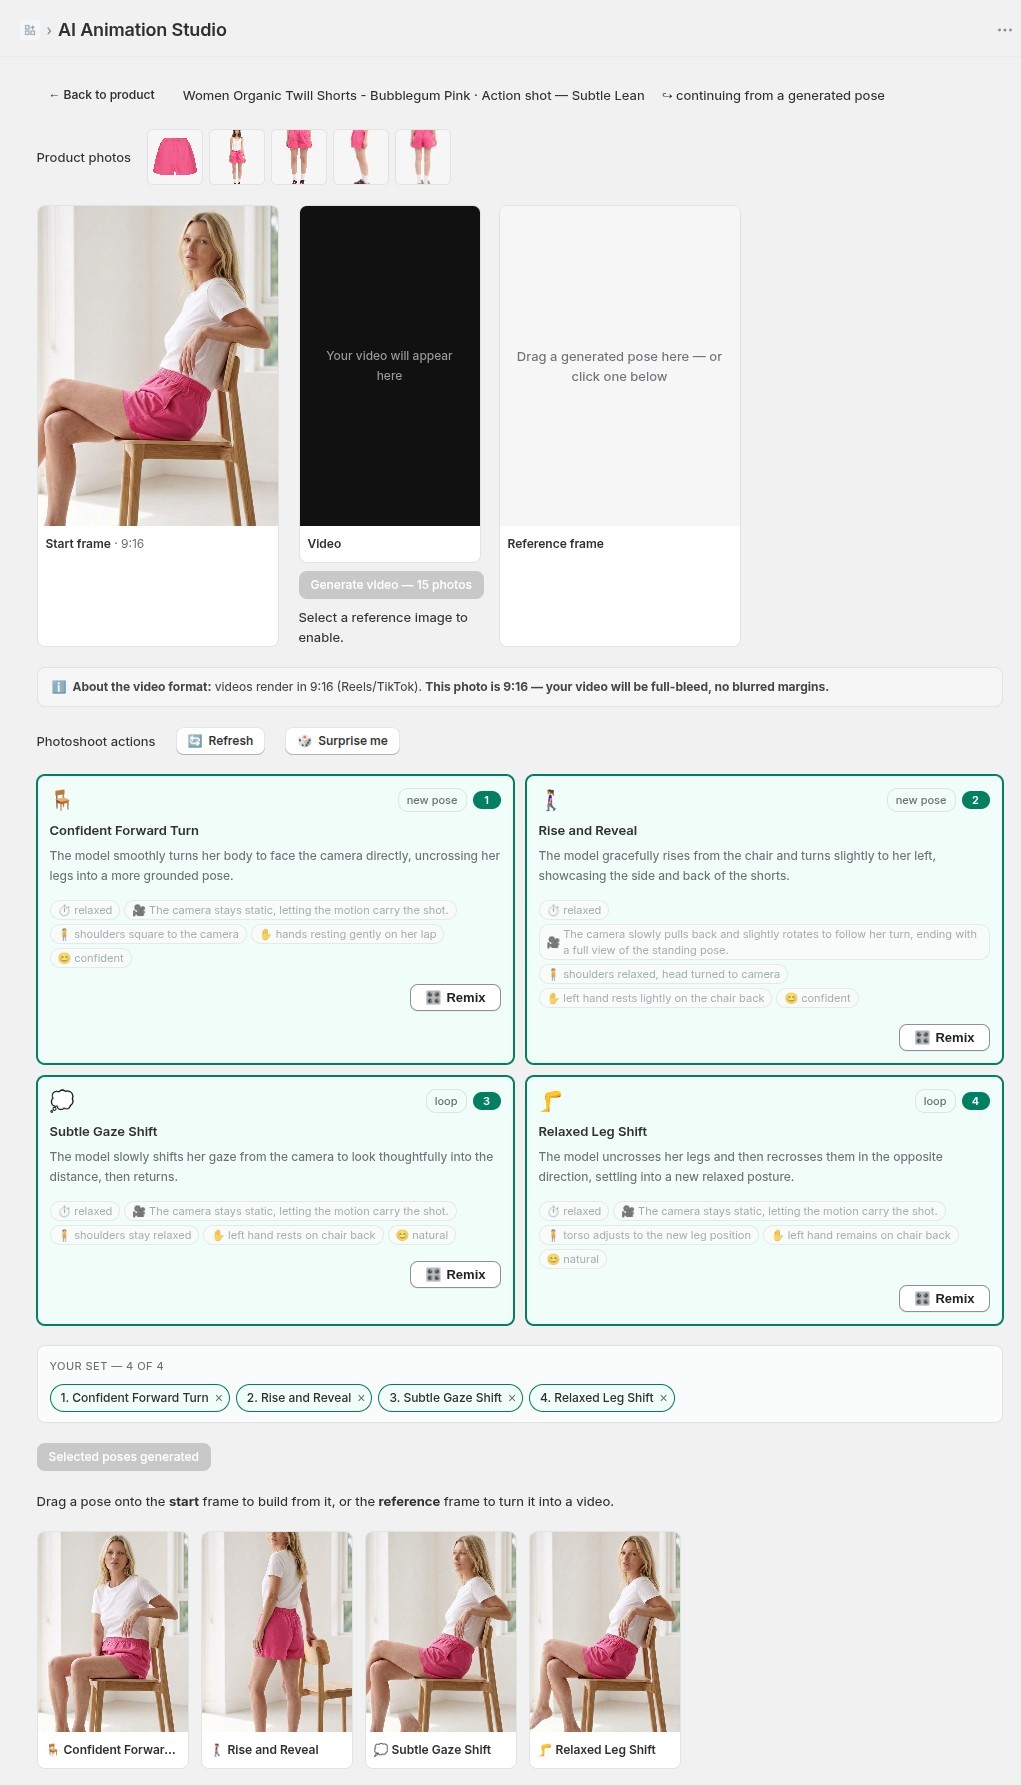
Any photo you’ve generated can become a 6-second, 1080p, 9:16 product video — no timeline, no editor, no exports. It all happens in the AI Animation Studio, one page that lays out the whole photo-to-video story left to right.
It starts with the poses. The Studio animates one photo into a whole set of on-model looks — front, back, a lively moment — each a keepable photo in its own right. Then you turn any of them into a video.
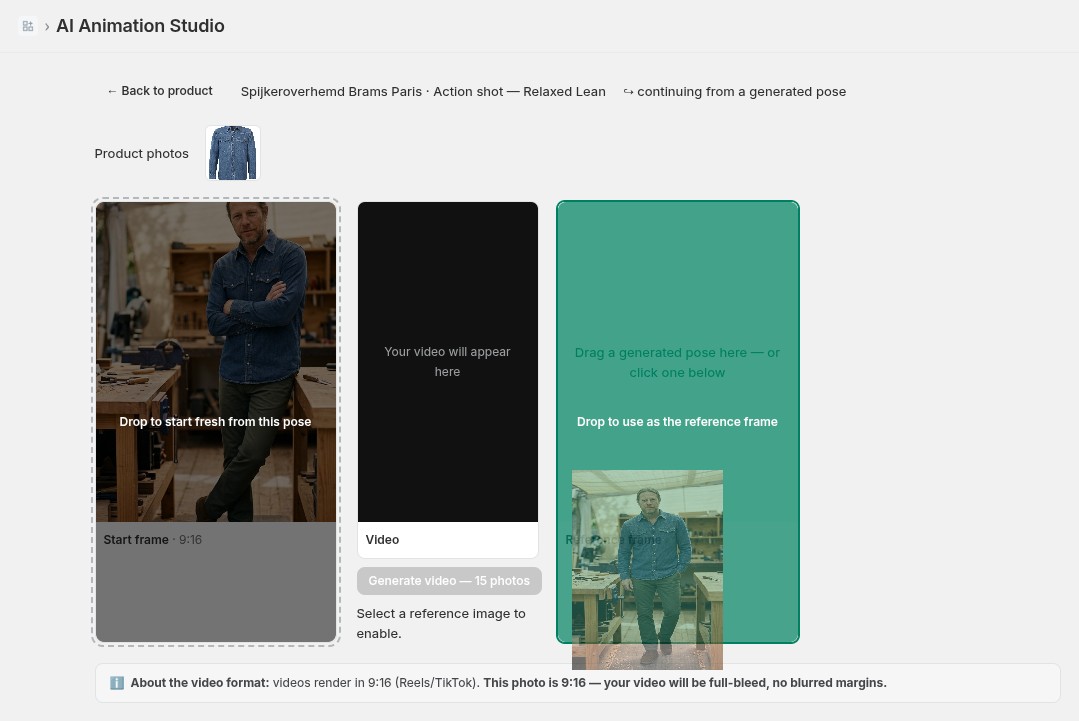
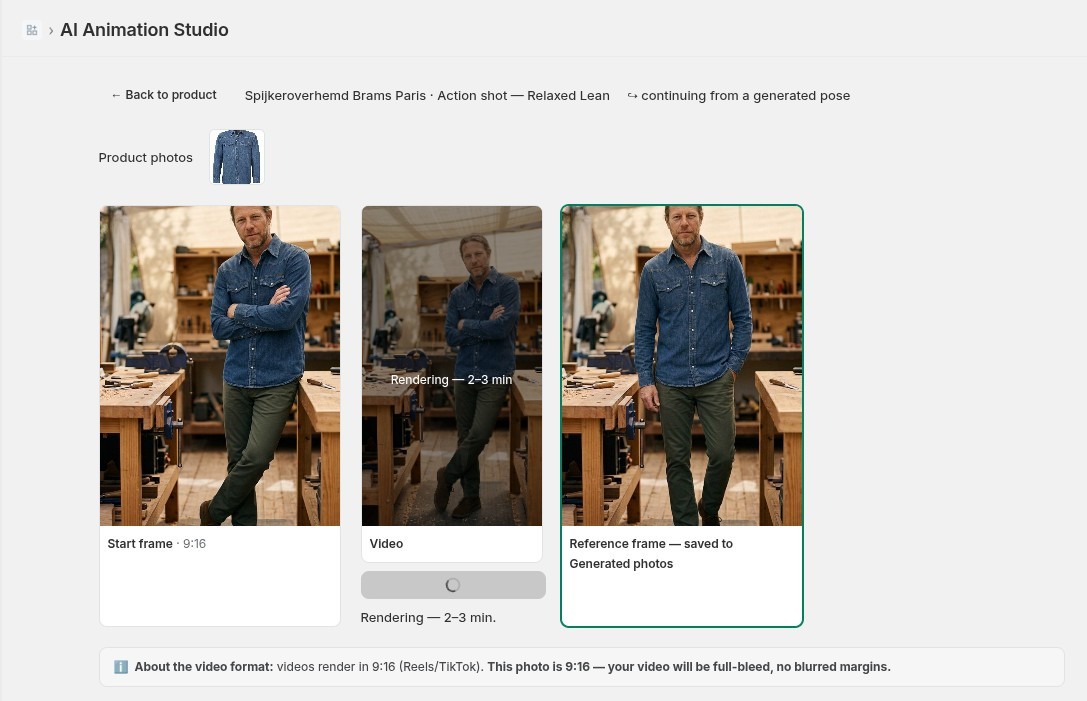
- Animate a photoOn any generated photo, hit 🎬 Animate to open the Studio. Up top you’ll see your product gallery (what it works from); in the middle, the three frames that are the video — the start frame, the video, and the reference frame (the end).
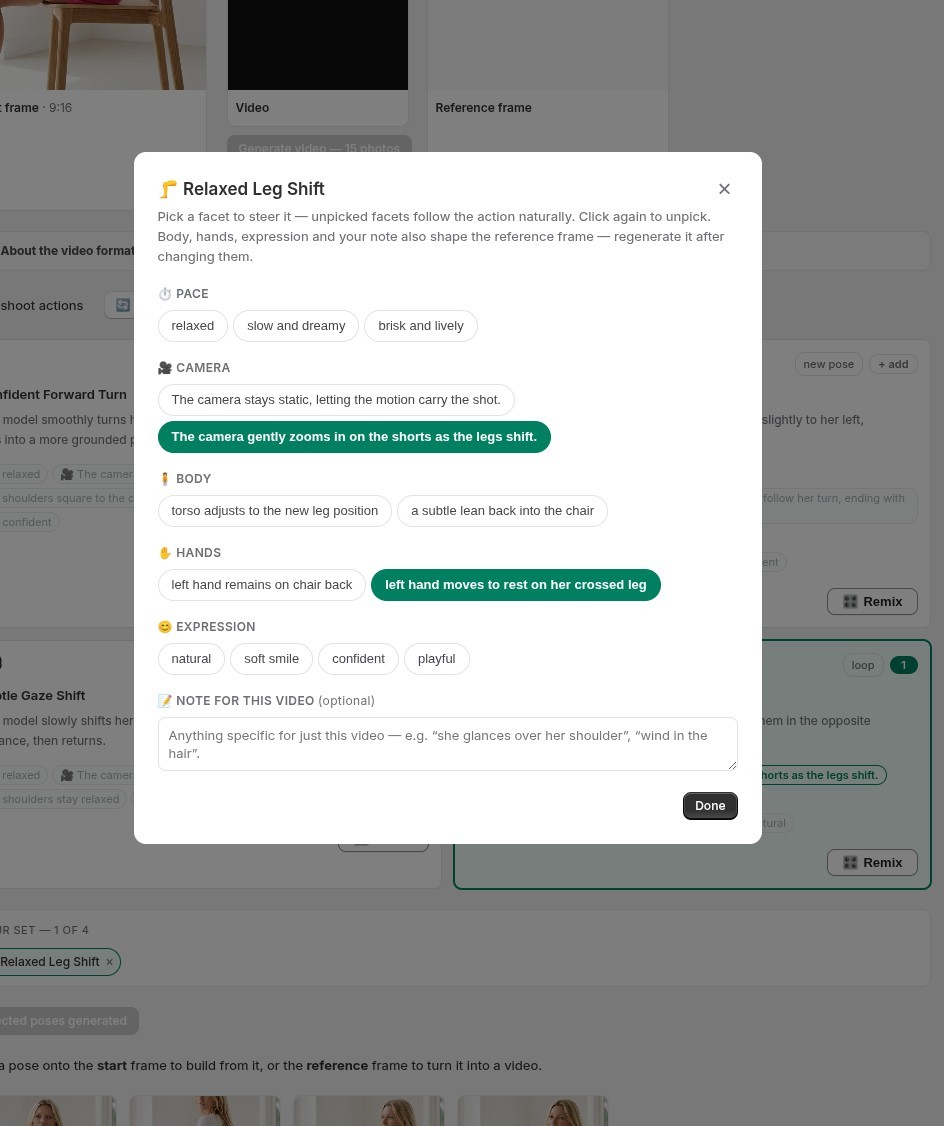
- Pick photoshoot actionsThe Studio suggests actions for your photo — a turn to show the back, a confident step, a gentle shift. Multi-select the ones you want; 🔄 Refresh or 🎲 Surprise me swaps in fresh ideas while keeping the poses you’ve already made. Remix a motion just like a look — pace, camera, body, hands, expression, plus a note.
- Generate the poses, then the videoGenerate a pose and it’s saved as a normal photo (a keeper either way). Drag a pose onto the reference frame to set the video’s end, then Generate video. It renders in 2–3 minutes and appears right between its frames, with Reels/TikTok (9:16), Instagram (4:5) and Square (1:1) downloads — or Activate it into your Shopify gallery.
6. Turn on the storefront Try-On
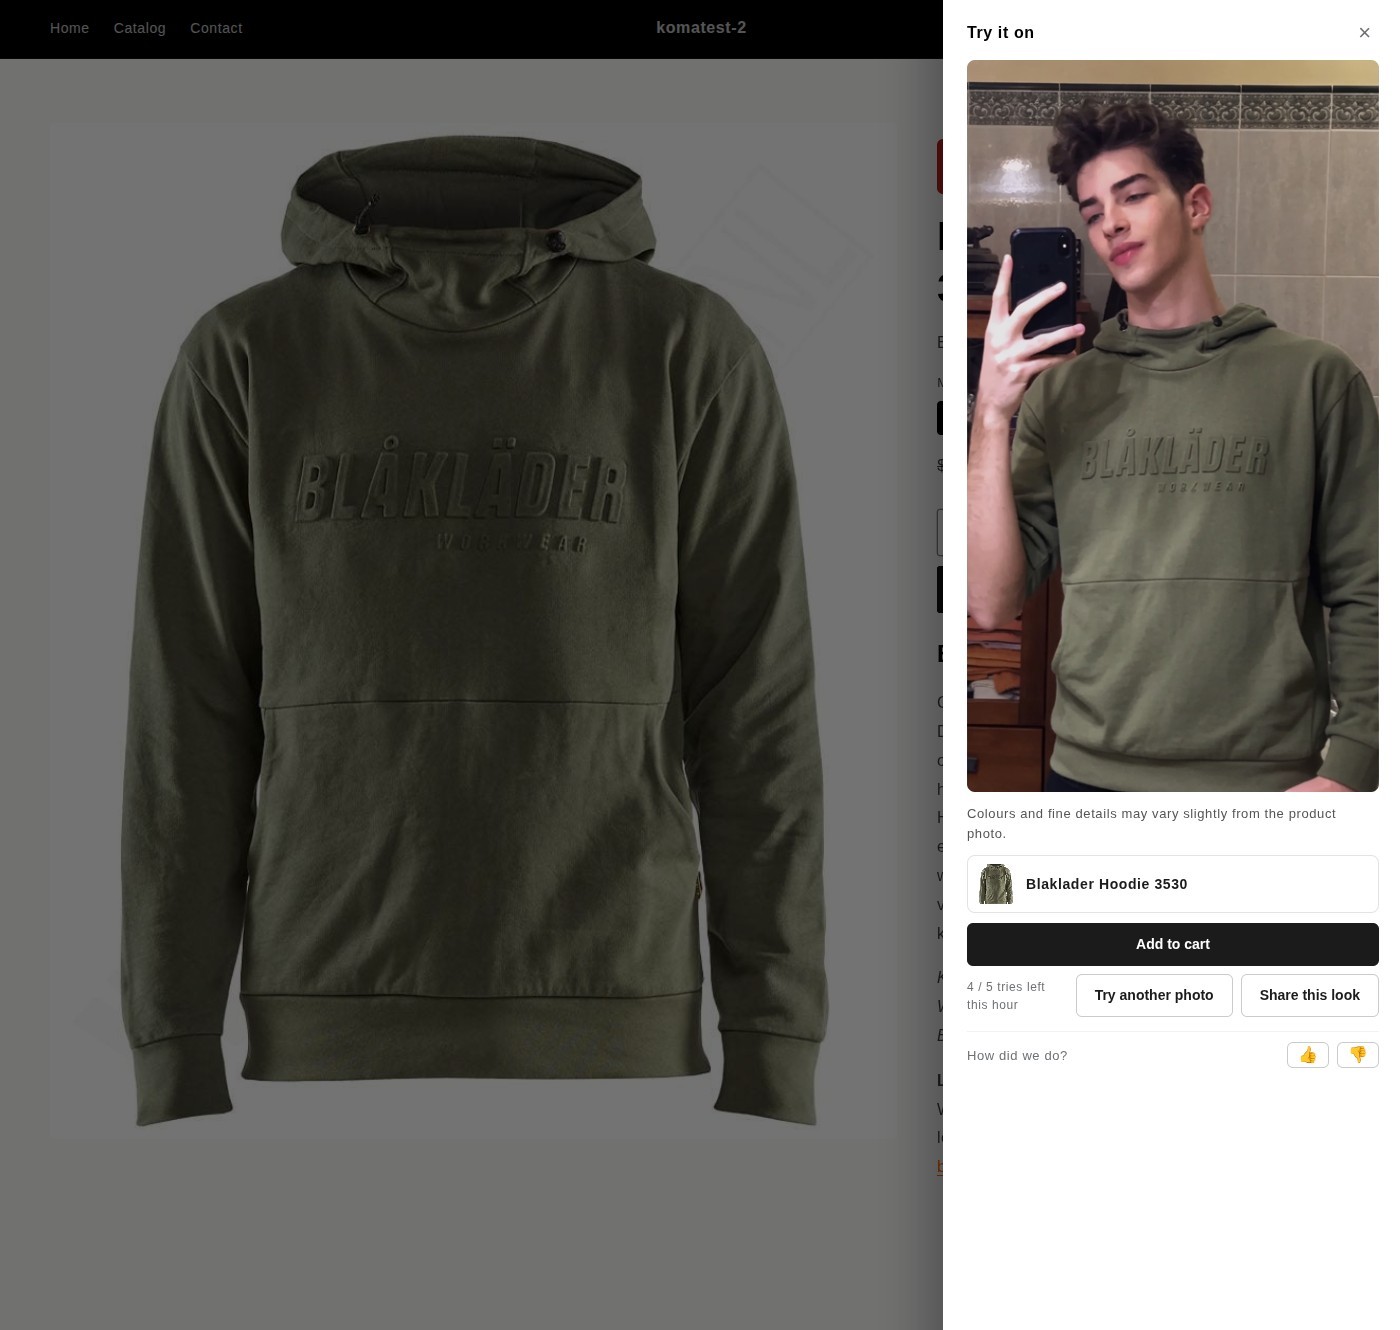
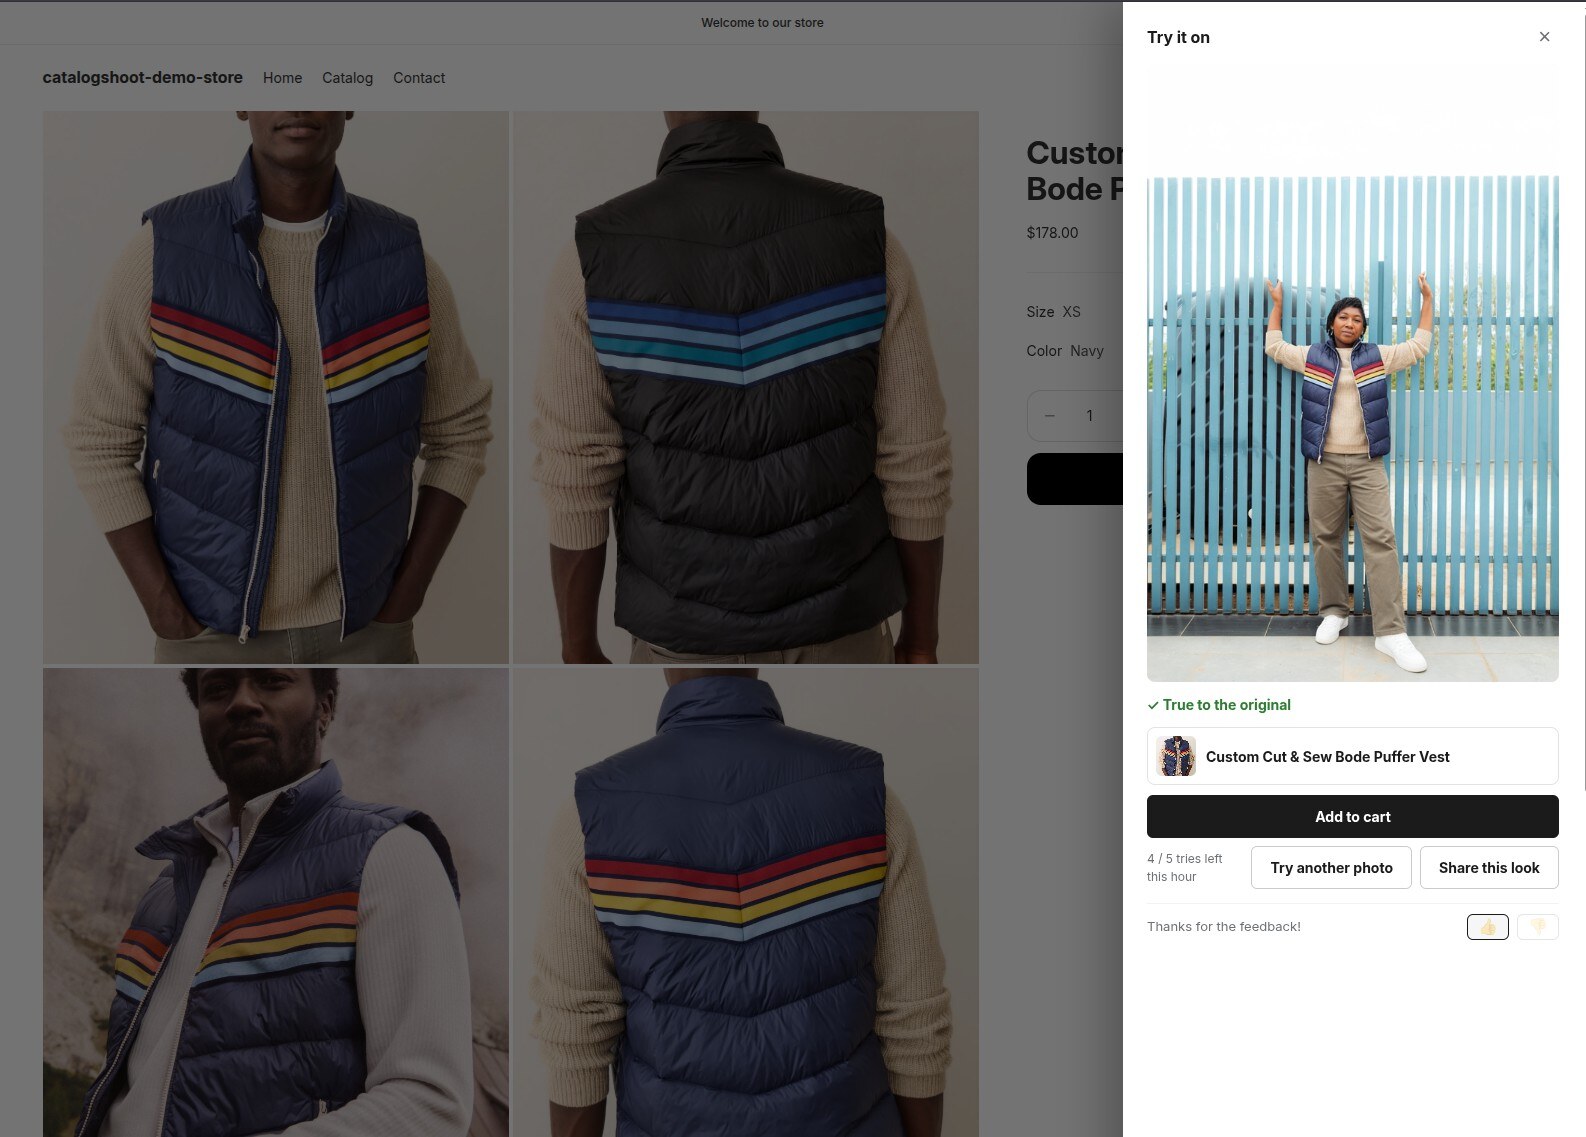
This is what makes CatalogShoot more than a photo tool: shoppers put your garment on their own body from a selfie, right on the product page.
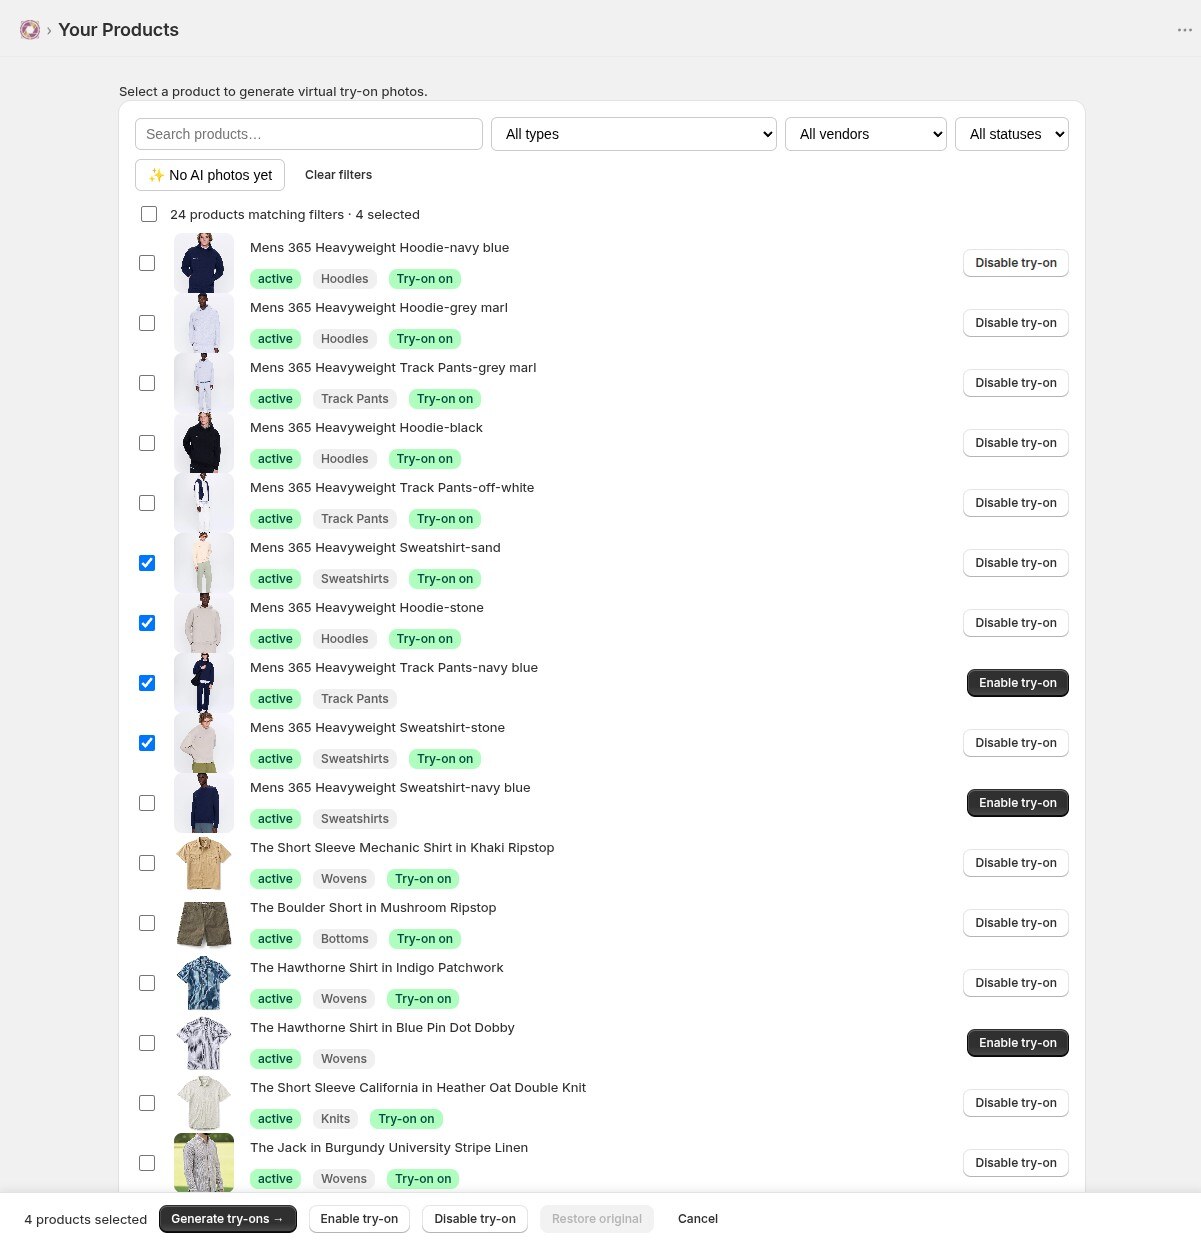
- Enable Try-On per productIn Products, switch Try-On on for the items you want it on (or enable a whole category or vendor in bulk). Off by default, so you stay in control.
- Add the button to your theme
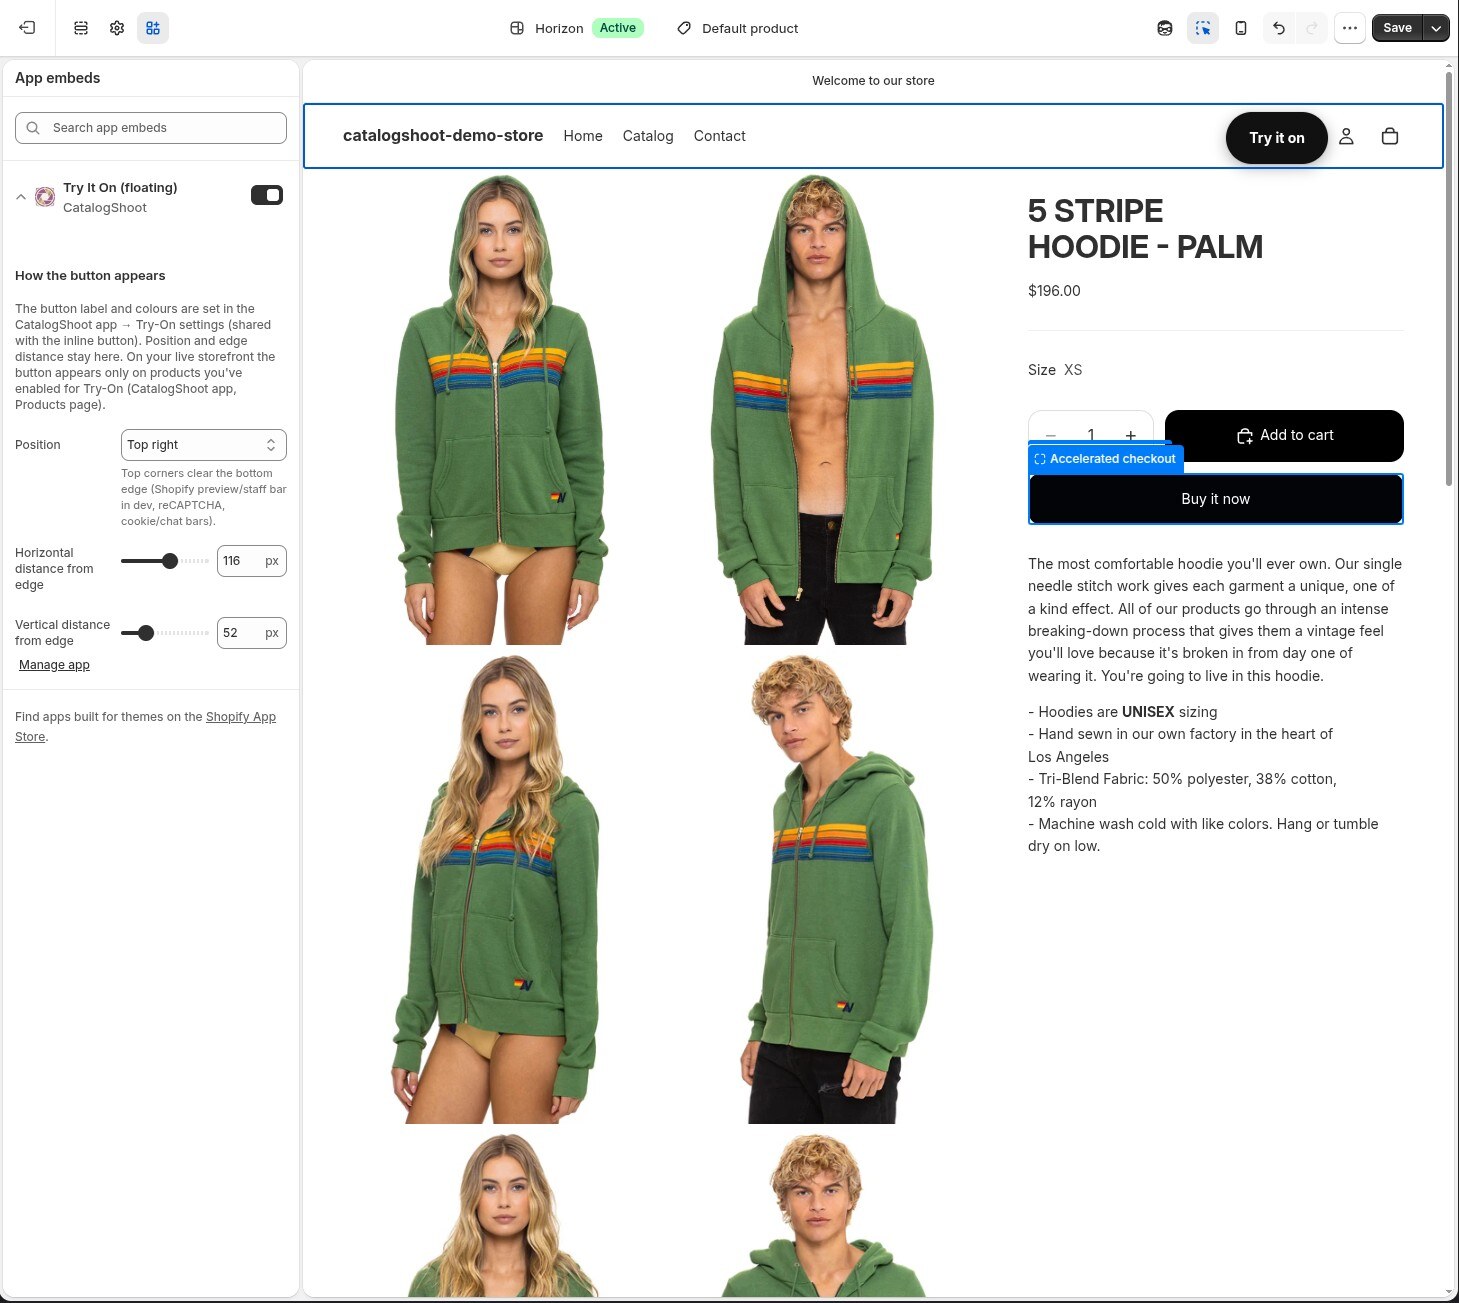
In the Shopify theme editor you have two options — use either or both:
- Inline button — add the Try It On block to your product template and drop it wherever you like (next to the price or Add-to-cart).
- Floating button — turn on the Try It On (floating) app embed for a button that rides a corner of every enabled product page. No placement needed.
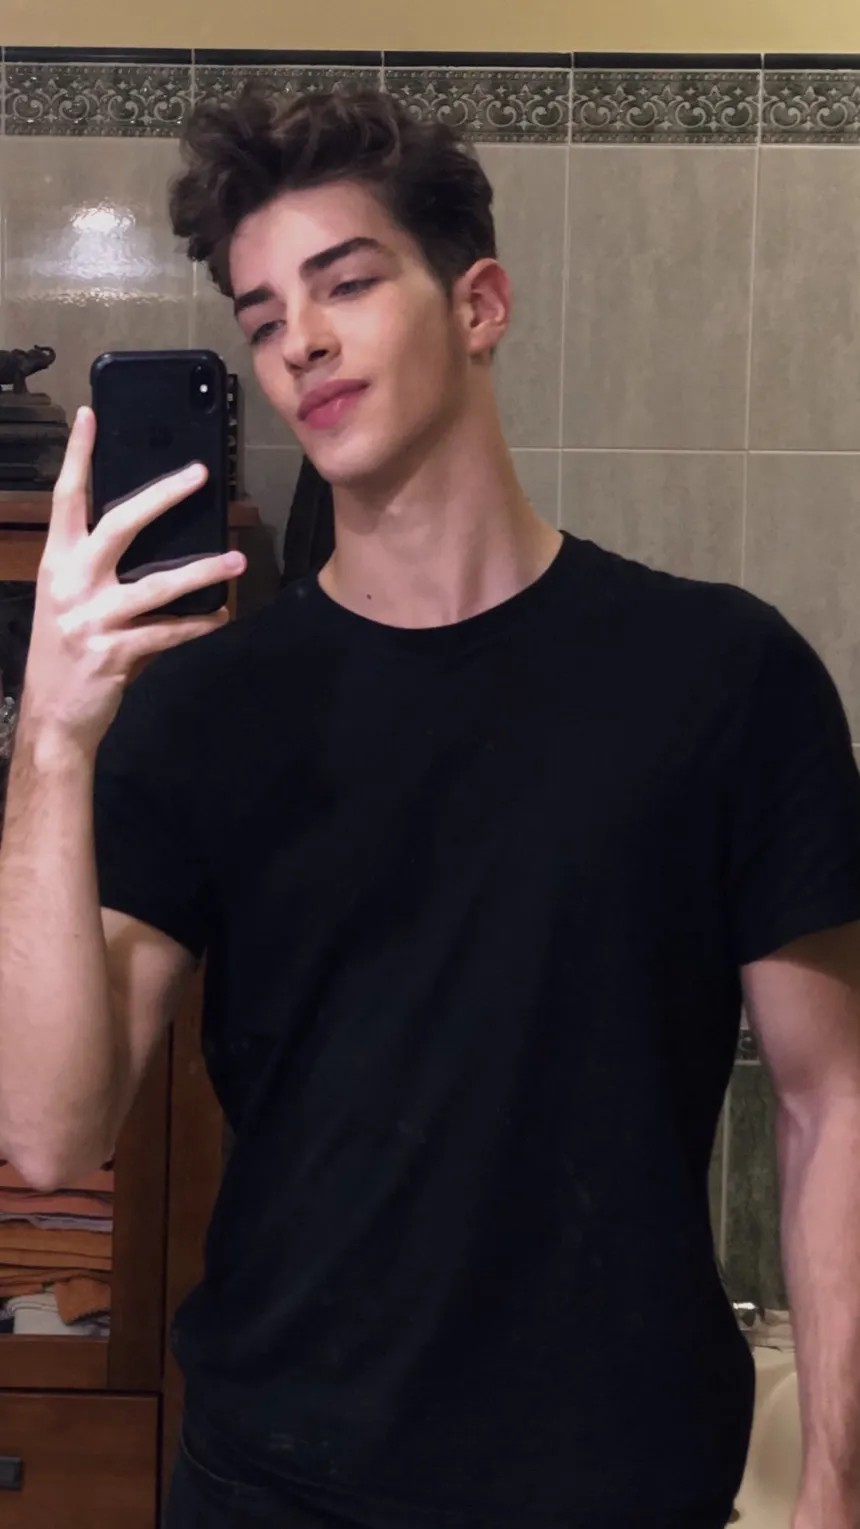
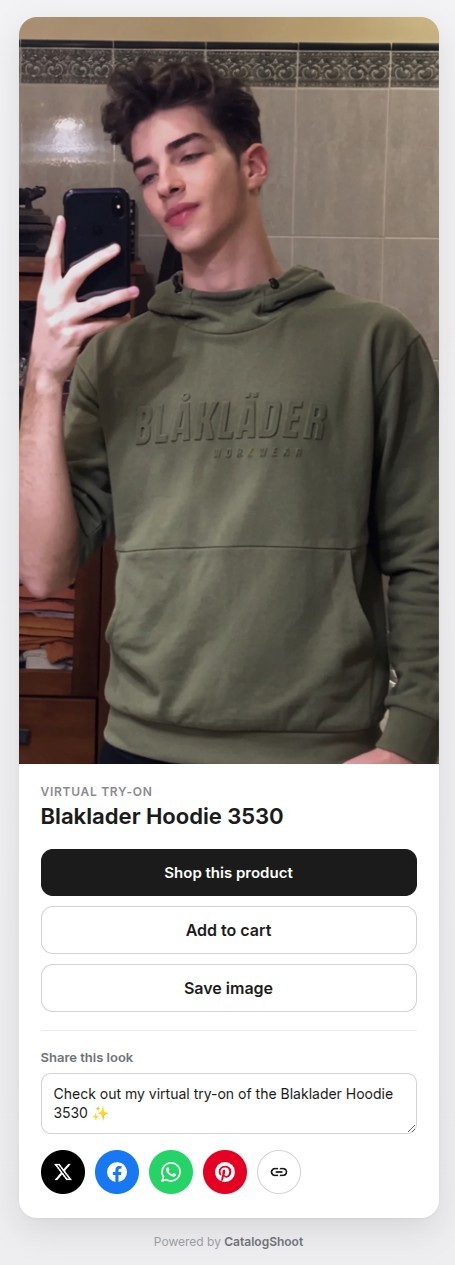
- That's itOn enabled products the button appears; a shopper taps it, uploads a photo, and sees your garment on themselves — then adds to cart, or saves and shares the look.
7. Style the button
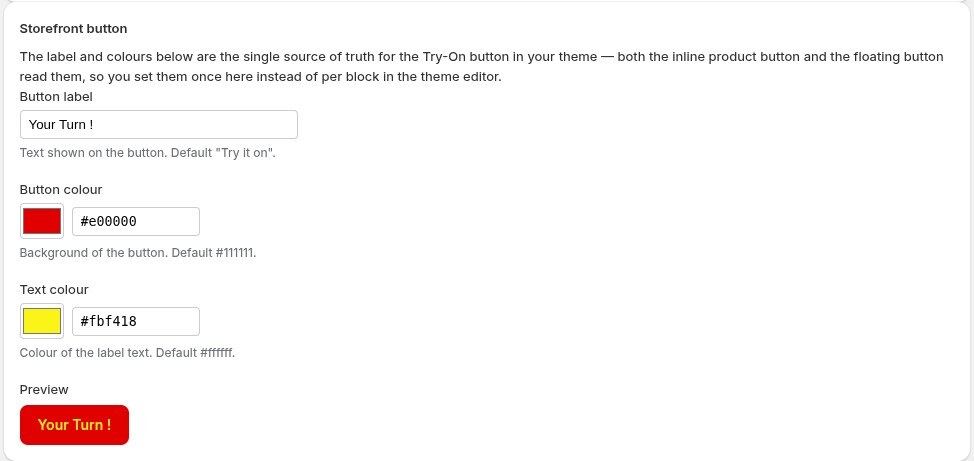
The button’s label and colours are set in one place — the app’s Try-On settings — and both buttons (inline and floating) read from it, so they always match. Set it once; no editing per block in the theme editor.
Label
Colours
Placement
8. Per-shopper limits
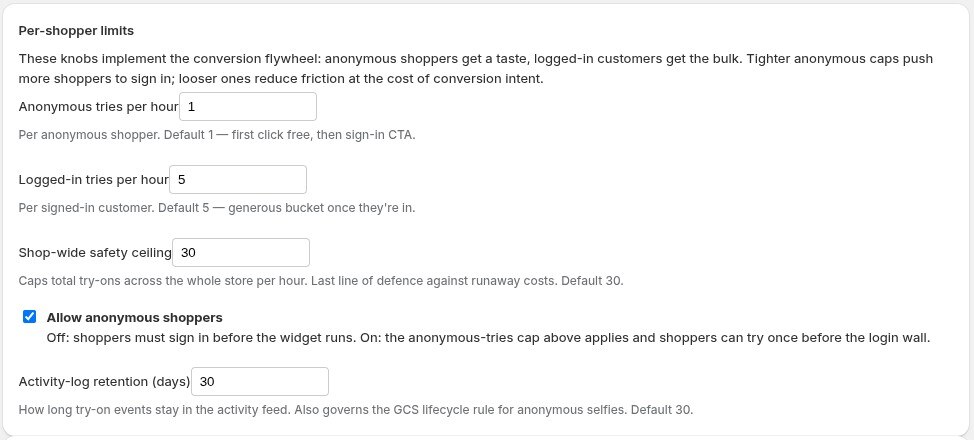
The Try-On settings page also tunes the conversion flywheel — how much shoppers can try before signing in, and a safety ceiling so costs never run away.
Anonymous tries
Logged-in tries
Shop-wide ceiling
9. Try-On activity
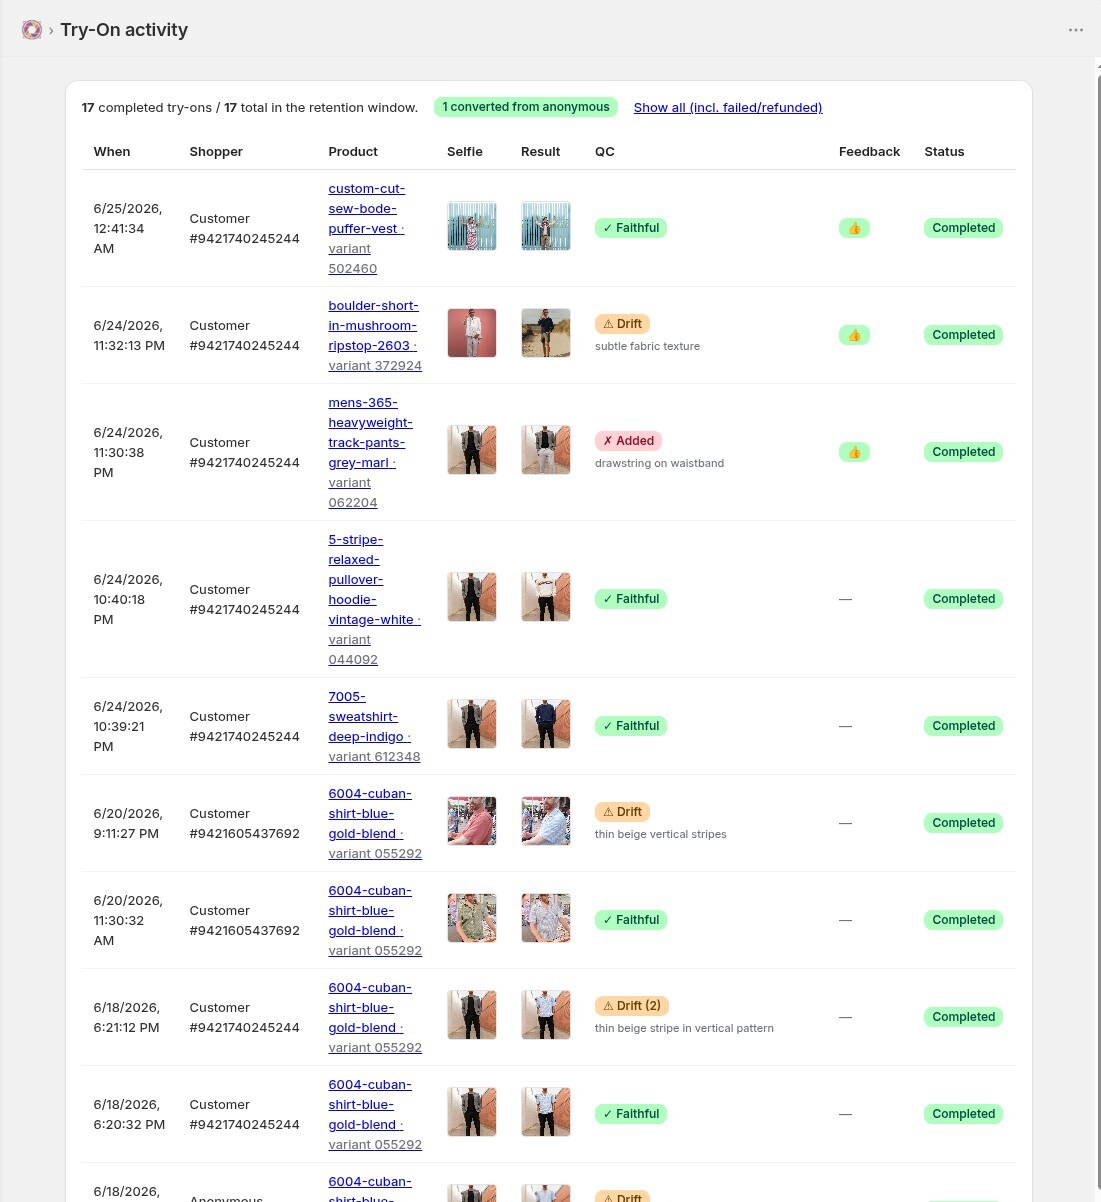
See try-ons as shoppers run them — which products are getting tried on, and how often. It’s your read on what’s resonating, and a sign of buying intent.
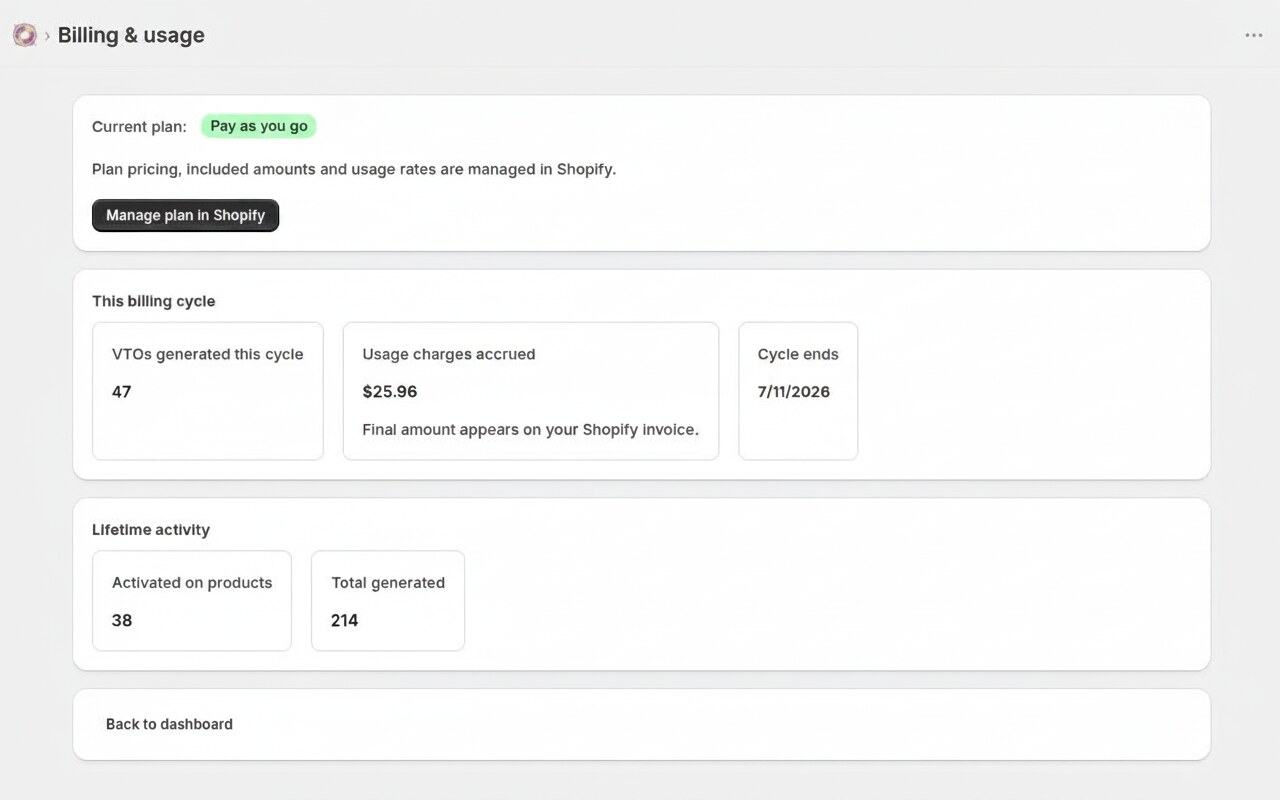
10. Billing & plans
Every plan is a low monthly base plus what you generate — a block included free, then a per-photo rate that drops as you scale. Billed through Shopify, alongside the rest of your store.
Pay as you Go
- First 3 photo generations free
- Then $0.59 each
Starter
- First 120 photo generations free
- Then $0.49 each
Growth
- First 400 photo generations free
- Then $0.30 each
Scale
- First 800 photo generations free
- Then $0.25 each